Easy Hummus with Canned Chickpeas and Tahini
Silky-smooth hummus with lemon and garlic topped with olive oil and paprika.
Servings: 8
Calories: 77kcal
Equipment
Ingredients
- 1 (15-ounce) can chickpeas , drained
- 1/4 cup tahini
- 1 large garlic clove , minced (about 1 1/2 teaspoons)
- 1/2 teaspoon sea salt
- 2-3 tablespoons freshly squeezed lemon juice
- 2 tablespoons extra-virgin olive oil – plus more for serving
- Freshly cracked pepper , for garnish
- Smoked paprika , or sumac (for garnish)
Instructions
- Drain the 1 (15-ounce) can chickpeas and transfer to a large bowl with enough water to cover the chickpeas by a couple of inches. Gently rub the chickpeas with your fingers to help dislodge the skins. As the skins float to the top of the water, skim off bean skins with a slotted spoon and discard.
- Continue to remove as many of the skins as possible (this may take about 5 minutes, but is important for a creamy-smooth texture). Drain the water off the chickpeas and transfer the chickpeas to a food processor.
- Add the 1 large garlic clove, 1/4 cup tahini, and 1/2 teaspoon sea salt to the chickpeas and process until the mixture begins to form a paste. With the machine running, add 2-3 tablespoons freshly squeezed lemon juice and 2 tablespoons extra-virgin olive oil – plus more for serving. Stop the machine and scrape down the sides. Taste, and add more lemon juice or salt, if needed. If the hummus isn’t smooth in texture, add 1-2 tablespoons of water, and process again.
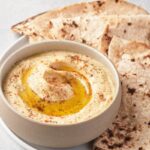
- Just before serving, use the back of a spoon to create a shallow indentation on the surface of the hummus. Drizzle with 2-3 tablespoons olive oil and sprinkle with paprika and freshly cracked pepper. (Can also be served with lemon wedges.)
Notes
Recipe Tips
- Canned chickpea hummus can be made several days in advance. Wait to garnish with oil until you’re ready to serve.
- This is a naturally gluten-free hummus recipe, so to keep your snack gluten-free, use gluten-free dippers.
- Store homemade hummus in the refrigerator for up to 7 days.
- To serve, remove from the fridge and bring to room temperature for the best flavor and texture.
- Spice it up with a sprinkle of crushed red pepper flakes over the top before serving.
- Substitute roasted garlic for the fresh garlic.
- Substitute toasted tahini for regular.
- Add 1/2 a roasted red pepper when pureeing the chickpeas.
- Add leftover cooked sweet potatoes, pumpkin, or grilled squash
Nutrition
Calories: 77kcal | Carbohydrates: 2g | Protein: 1g | Fat: 7g | Saturated Fat: 1g | Polyunsaturated Fat: 2g | Monounsaturated Fat: 4g | Sodium: 148mg | Potassium: 40mg | Fiber: 1g | Sugar: 1g | Vitamin A: 5IU | Vitamin C: 2mg | Calcium: 12mg | Iron: 1mg