Melty cheese, earthy green chiles, and tender shredded chicken all rolled in corn tortillas for a satisfying Green Chile Chicken Enchilada family dinner.
We show you how to stock your freezer with this go-to make-ahead meal without compromising texture so your freezer dinner tastes fresh and not like leftovers.
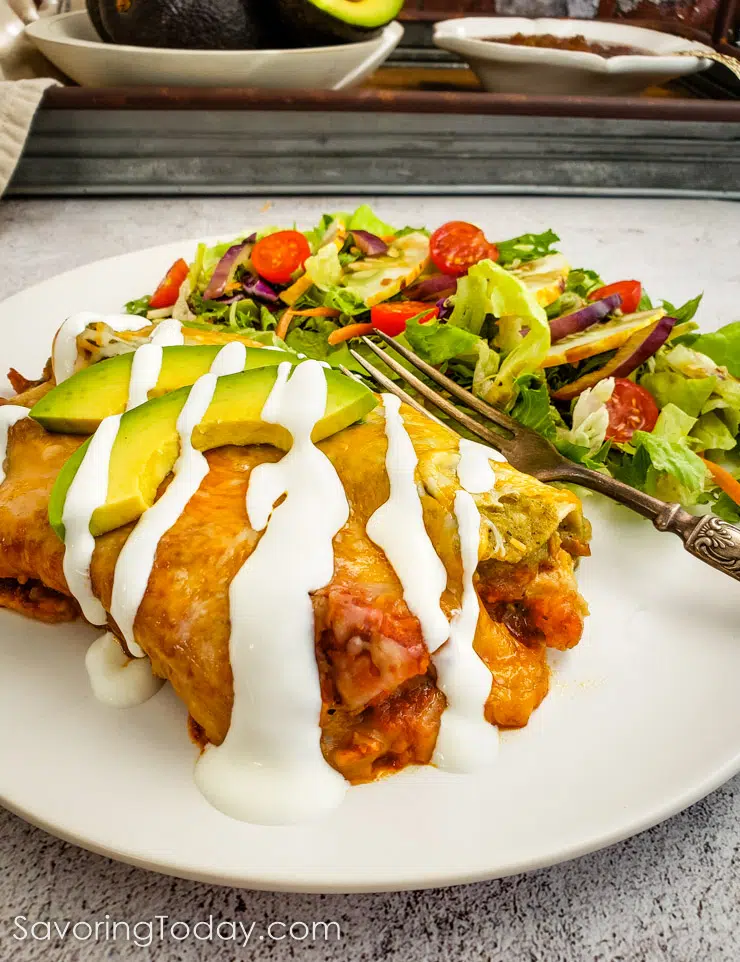
Table of contents
No one would mistake our family recipe with authentic Mexican enchiladas. This green chicken enchilada recipe is our own version of the basic concept of meat and cheese stuffed tortillas with homemade chile sauce.
One of the differences in this recipe is that we soften the corn tortillas in coconut oil instead of dipping the tortillas in the enchilada sauce before rolling. We choose oil for a couple of reasons—mainly for texture and freezing quality.
Food texture is a big deal at our house so we prefer enchiladas with a firmer bite (less mushy). Dipping the tortillas in oil before we roll and bake them helps seal the tortillas and crisp the edges during the pre-bake before we add the sauce.
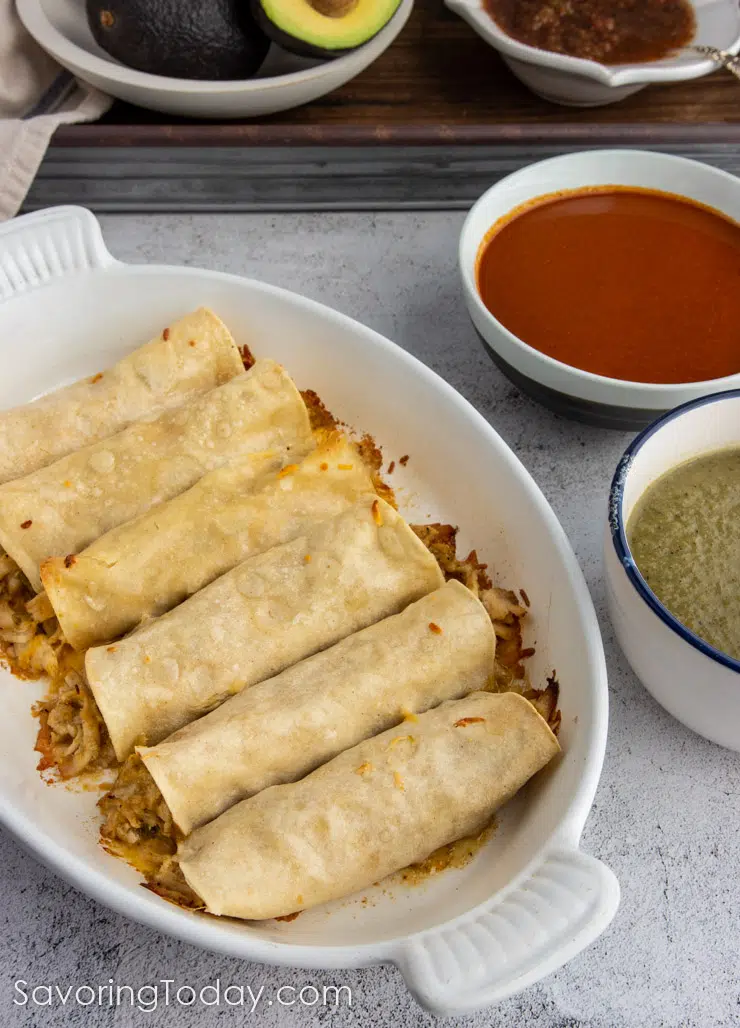
Another reason we use oil instead of enchilada sauce to soften the tortillas is that when our kids were little they didn’t like sauces of any kind (ugh, I know!). I could bake the entire pan of enchiladas, remove a couple for them, and then add the sauce without the tortillas falling apart. They preferred the lightly browned edges and firmer texture similar to taquitos, which they liked.
Green chile chicken enchiladas is also a favorite make-ahead meal and a regular on our Monthly Cooking Menu, so softening the tortillas in oil helps the enchiladas hold their shape better from freezer to oven. The oil also makes it a little easier to separate them once they are frozen.
You’re gonna love how easy it is to make Green Chile Chicken Enchiladas for dinner any day of the week—especially if you make a big batch and pop them in the freezer!
Chicken Enchilada Ingredient and Recipe Tips
Roasting a Bone-In Chicken
I recommend roasting a whole chicken so you have the bones, including the bony back, to make homemade chicken stock. Start from scratch with a whole chicken and cut it up into parts, buy bone-in pieces like legs and thighs, or take the shortcut with a cooked rotisserie chicken.
You’ll find the full recipe for roasting chicken in the 2nd recipe card in this post here.
- One 4-pound chicken will render about 5 cups of shredded meat. One bird will make enough enchiladas to fill two 13×9 pans, approximately 20 rolled enchiladas.
- Save time with a rotisserie chicken. If using a rotisserie chicken in place of roasting your own, taste the chicken for flavor. If it is already well-seasoned, reduce the onion, salt, pepper, cumin, and garlic in the enchilada seasoning by 1/4 to compensate for the already seasoned bird. Rotisserie chicken from Costco or Sams will be big enough for this recipe, otherwise, if using rotisserie chicken from a grocery store you will likely need two to yield enough meat.
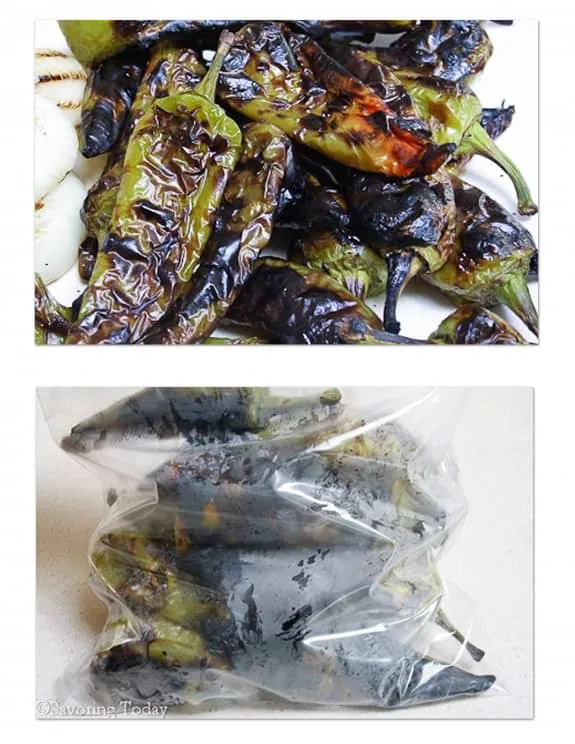
Roasted Green Chiles
Fresh roasted green chiles are always a good idea, especially if you can be confident of the level of spice. Of course, you can use canned or jarred roasted chiles in the enchiladas, but if you want to roast your own here’s how:
Roasting chile peppers:
- Place whole chiles on a foil-lined baking sheet about 6 inches under the broiler in the oven, and broil on high until well blistered and dark brown/black all over (you’ll have to keep an eye on them and turn them over on the pan with tongs).
If grilling, place peppers directly on the grill grates and cook on high. - Once roasted, transfer peppers to a plastic bag to steam, about 15 minutes.
(Now is the time to put some kitchen gloves on.) - Carefully remove the chiles from the bag, let cool if need be, cut the chiles open with a knife to remove seeds, and chop the chiles.
TIP: When I don’t have fresh roasted green chiles, I prefer 505 Southwestern Chopped Roasted Green Chiles because I know I can count on them for consistent flavor and quality.
Selecting the Best Enchilada Cheese
Look for a Mexican cheese blend that includes Monterey Jack, Cheddar, Asadero, and Queso Quesadilla Cheese which is ideal for enchiladas for flavor and silky-smooth texture when melted. Asadero and Queso quesadilla cheese are mild in flavor with excellent melting properties so it’s important to have them in the mix. Avoid blends that are heavier on cheddar which can separate and become oily when baked.
Using Coconut Oil to Soften Tortillas
Any oil can be used to soften the tortillas, however, I use coconut oil because it creates a nice thin coating that hardens on the enchilada when I freeze them for make-ahead meals. This light coating creates a barrier so the corn tortilla doesn’t absorb moisture in the freezer or from the sauce when baked. It’s the best way to retain texture integrity from freezer to oven.
Time-Saver TIP: Try a casserole variation of this dish by simply layering everything in a casserole dish like lasagna instead of rolling. MAKE IT—Spread some of the sauce into the bottom of a casserole dish and then layer tortillas, chicken, and sauce until the pan is almost full, finishing with sauce on top. Sprinkle with cheese and bake for about 40 minutes. Cut into squares and serve. ♥ The casserole version of this recipe will have all the same delicious goodness of the enchiladas but with a different texture because the tortillas absorb more of the sauce making them very soft.
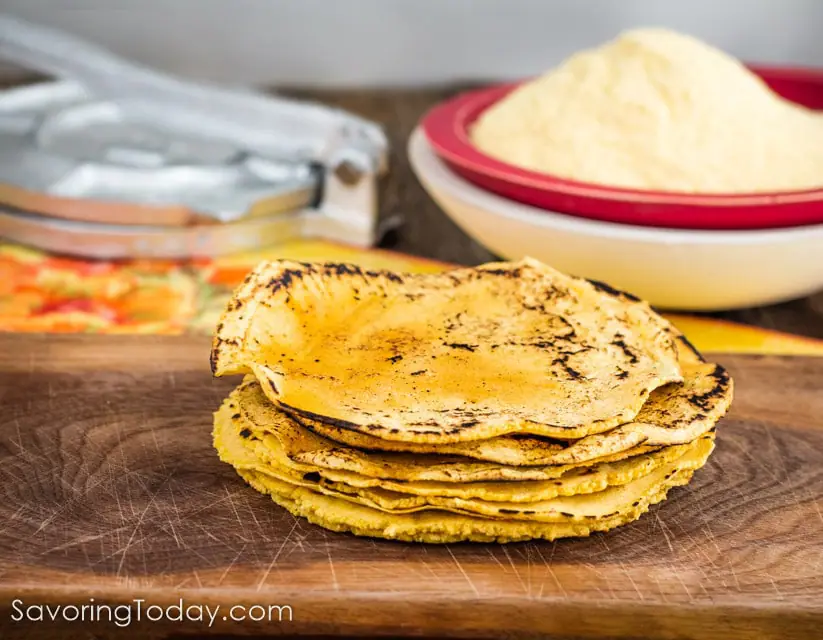
Corn, Flour, and Specialty Tortillas
Corn, flour, or other specialty tortillas are suitable for enchiladas, though I have only tested corn and flour tortillas in this recipe. If using flour tortillas, I still soften with the oil for the same reasons as previously mentioned, however, they can also be softened by covering them with a damp paper towel and microwaving for 20-30 seconds to make them more pliable and easier to roll. You can then brush flour tortillas with a little oil before baking to crisp the edges. To make homemade corn tortillas, follow this easy recipe: Homemade Corn Tortillas
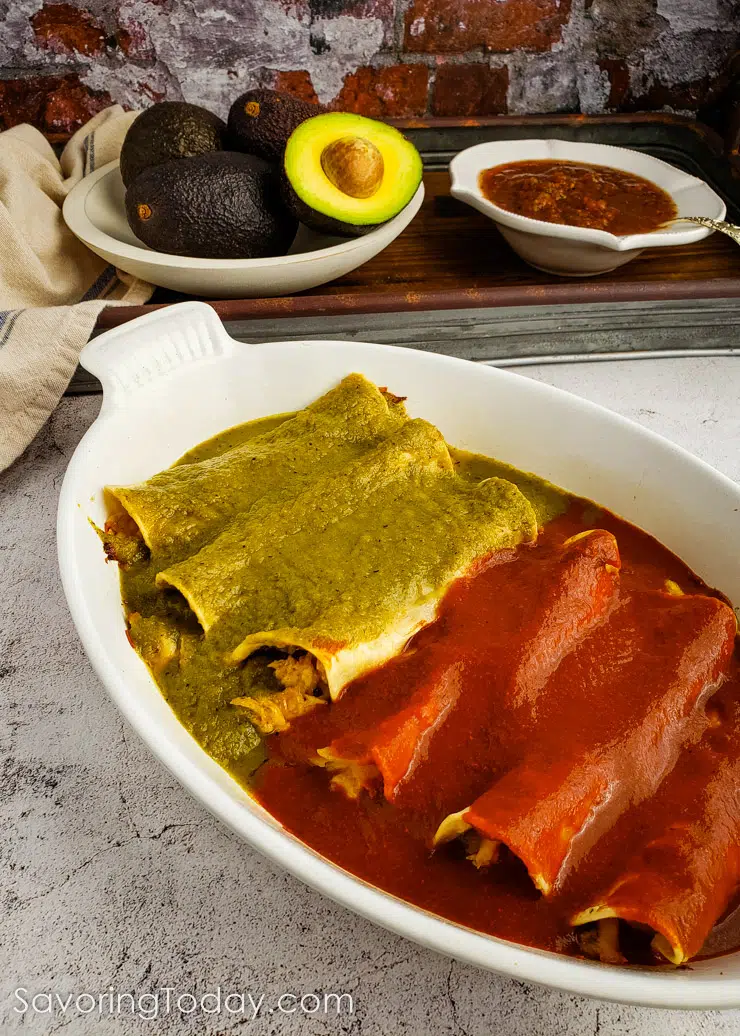
Green vs. Red Sauce for Enchiladas
Typically, people gravitate toward either red chile or green chile sauces on their enchiladas—but we aren’t typical as we like both.
We have always loved the earthy, vegetal flavor of green chiles, especially in burgers, soups, and dips, so we can’t pass up the chance to layer green sauce on top of our enchiladas.
Then there is the deep, smoky flavor of the ancho chile we use in our homemade red sauce that draws us in with its hearty essence and medium-mild heat that doesn’t linger too long on the tongue. So we can’t resist spooning some red sauce on there too.
Can’t choose? Make or buy both sauces!
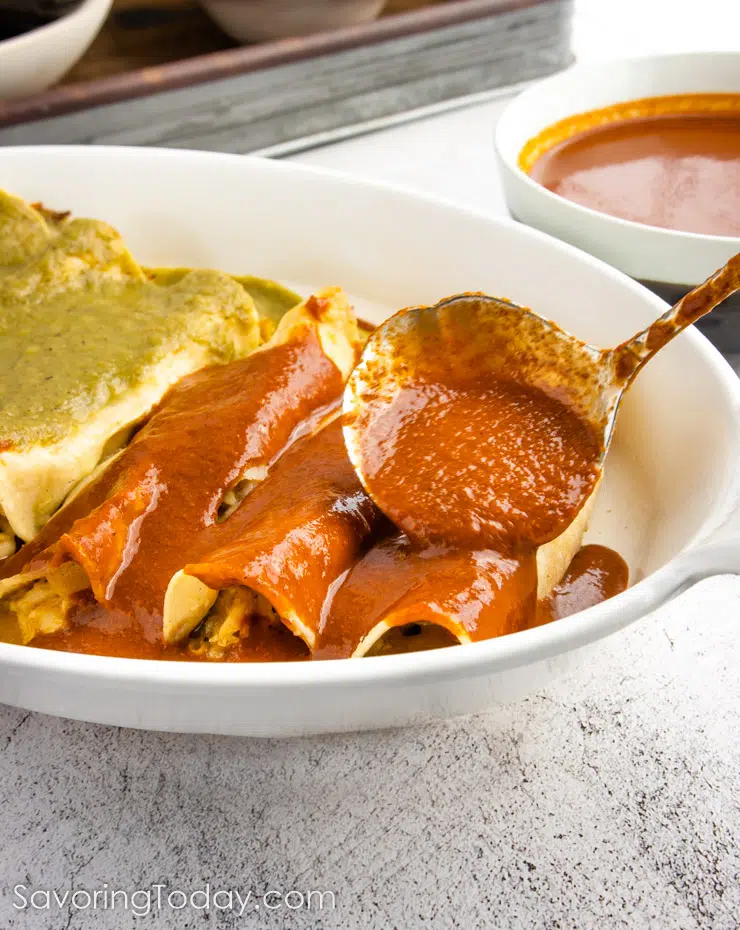
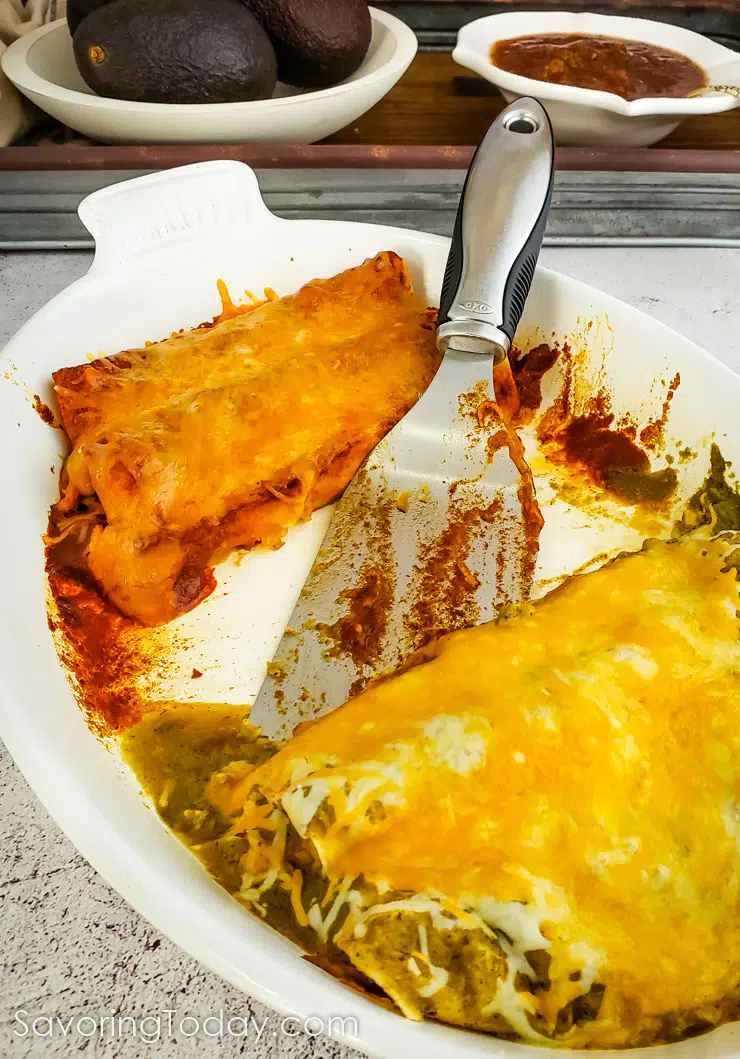
In New Mexico preparing enchiladas with both red and green sauce is called serving them “Christmas-style”. It’s the best of both worlds when we serve the red and green sauces together, either splitting the pan with half on each side or alternating with red then green for a pretty striped effect.
Homemade and The Best Store-Bought Enchilada Sauce
Our homemade Tomatillo-Green Chile and Red Ancho Chile sauces are included below and so worth the effort, but sometimes I don’t have time to make them fresh.
When I need a premade sauce, I always reach for Frontera Green Chile Enchilada Sauce or Frontera Red Chile Enchilada Sauce. Their sauces are truly delicious, the ingredient list is short, and the sauce is NOT packaged in cans that cause metallic, off-putting flavors. Frontera is widely available in both grocery and health food stores.
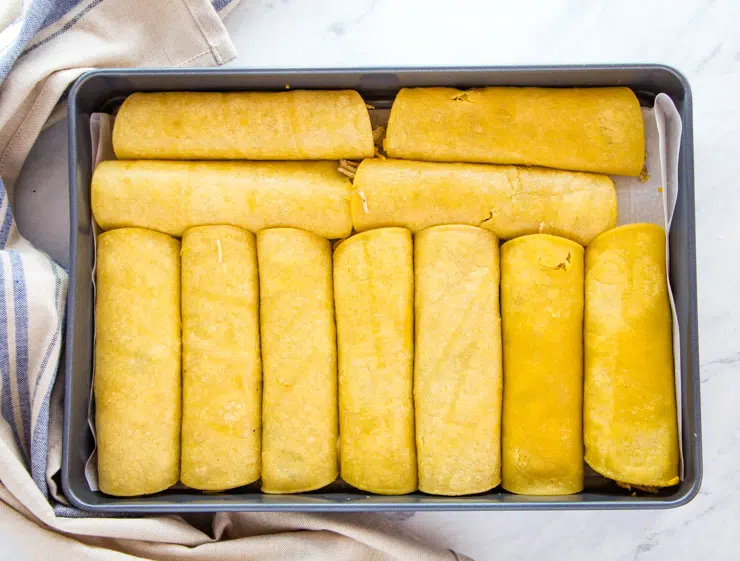
How to Make-Ahead and Freeze Enchiladas for Best Results
- For space-saving and long-term storage in the freezer, line the pan with parchment paper or plastic wrap before placing the enchiladas in the pan. Cover the pan with foil and freeze. Once frozen, remove the enchiladas from the pan and transfer to a resealable freezer bag or vacuum seal bag and keep in the freezer for up to 3 months. Defrost in the refrigerator or bake an additional 5-10 minutes if frozen.
- If cooking the enchiladas within 30 days and freezer space is not an issue, freeze the enchiladas in the pan you plan to bake them in without lining the pan. Cover the pan with foil and freeze.
- In either case, freeze any sauces separately so the tortillas do not absorb the sauce during the freezing process.
- Defrost the enchiladas and the sauce in the fridge and following the recipe baking instructions as written.
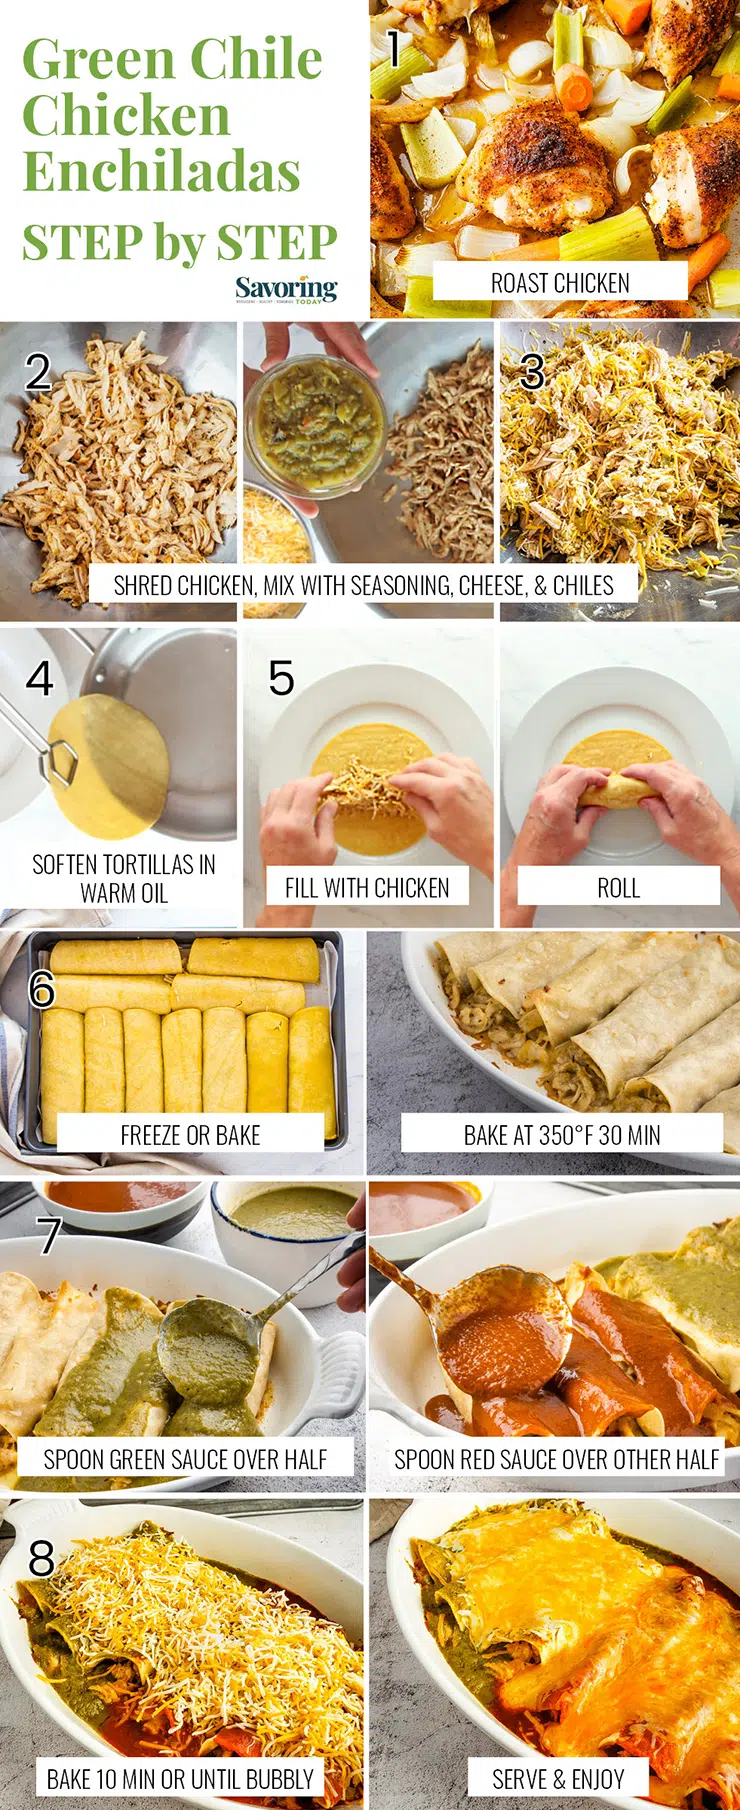
Green Chile Chicken Enchiladas Step by Step
- Roast and shred the chicken (recipe below)
- Mix and sprinkle the spice mix over shredded chicken and toss until well incorporated
- Toss chicken with green chiles and cheese
- Dip each tortilla into warm oil, using tongs, to coat both sides and softened. Drag the tortilla up the side-edge of the skillet to drain off excess oil, then set the tortilla on a plate to be filled.
- Fill with 1/3 cup of the shredded chicken mixture across the middle and roll the tortilla around it by folding two sides in, with one overlapping the other. Arrange the rolled tortillas seam-side down in a 13×9 pan (line with parchment if freezing)
- Bake uncovered at 350°F for about 20 minutes, or until edges just begin to brown.
- Ladel sauce over enchiladas and sprinkle with 1/2 cup of cheese.
- Bake an additional 15 minutes or until bubbly. Serve hot, garnished with sour cream and fresh avocado.
More Mexican and Southwest Style Recipes You’ll Love
- Southwest Cauliflower Rice Pilaf with Toasted Pepitas
- Skillet Beef Fajitas
- The BEST Guacamole Recipe
- Huevos Rancheros with Tomatillo-Green Chile Sauce
- Tacos with Picadillo
- Chicken Tortilla Soup
Green Chile Chicken Enchiladas
Ingredients
- 1 4 lb chicken (4-5 cups shredded chicken meat)
- 1.5 tablespoons granulated onion
- 1.5 tablespoons ground cumin
- 2 teaspoons granulated garlic
- 1 teaspoon sea salt
- 1 teaspoon freshly ground black pepper
- 1 cup chopped roasted green chilies canned or jar (505 brand preferred)
- 4 cups shredded Mexican-style cheese
- 1/3 cup coconut oil for softening tortillas
- 20 6-inch corn or flour tortillas
- 16 ounces Frontera green enchilada sauce or any favorite
- 16 ounces Frontera red enchilada sauce or any favorite
Instructions
- ROAST CHICKEN FIRST PER 2nd RECIPE CARD IN POST (If using rotisserie chicken, start at STEP 2)
- Once the roasted chicken is cool enough to handle, separate meat from bone, skin, and connective tissue by pulling chicken meat apart into small shredded pieces with your fingers. Save and freeze the bones and for making chicken stock at a later time, if desired.
- Mix together the granulated onion, cumin, granulated garlic, sea salt, and pepper in a small bowl. In a large bowl, sprinkle spice mix over shredded chicken and toss until well incorporated. Toss with green chiles until well mixed, and then with the cheese.
- Warm oil in a 10 inch skillet with sloped sides, over low heat (the oil should be hot enough to quickly soften the tortilla but not fry it). With a pair of tongs, dip each tortilla into the warm oil to coat both sides and softened about 20 seconds. Using the tongs, drag the tortilla up the side-edge of the skillet to drain off excess oil, then set the tortilla on a plate to be filled.
- Fill with 1/3 cup of the shredded chicken mixture across the middle and roll the tortilla around it by folding the two sides in, with one overlapping the other. Place the rolled tortillas seam-side down in a 13×9 pan (the recipe makes enough for two 13×9 pans). At this point, you can bake and serve or freeze for later.IF FREEZING FOR LATER: Line the pan with parchment, plastic wrap, or foil so the enchiladas will easily release once frozen—if you plan to bake in this pan from the freezer, do not line the pan. Place the rolled enchiladas on the lined pan, cover the pan with foil, and freeze. Save space in the freezer by transferring the frozen enchiladas to a zip-type freezer bag.
- Bake enchiladas uncovered at 350°F for 30 minutes, or until the edges of the tortillas just begin to brown. Pour sauce over enchiladas enough to cover the tortillas and pool in the bottom of the pan about a 1/4-inch. Top with shredded cheese and bake an additional 10 minutes, or until the sauce and cheese is hot and bubbly. S
- Serve hot garnished with sour cream and fresh avocado.
Video Displays Here or In Post
Notes
Make-Ahead:
Line the pan with parchment, plastic wrap, or foil so the enchiladas will easily release once frozen—if you plan to bake in this pan from the freezer, do not line the pan. Place the rolled enchiladas on the lined pan, cover the pan with foil, and freeze. Once the enchiladas are frozen transfer to a zip-type freezer bag for longer space-saving storage.Recipe Variations:
To save time dipping and rolling, the chicken and tortillas can be layered with enchilada sauce in a casserole dish and baked for 45 minutes. This method will taste the same but will be different in texture as the tortillas absorb more of the sauce and are less firm. Cut into squares and serve. How to Roast Green Chiles Roasting chile peppers:- Place whole chiles on a foil-lined baking sheet about 6 inches under the broiler in the oven, and broil on high until well blistered and dark brown/black all over (you’ll have to keep an eye on them and turn them over on the pan with tongs).
If grilling, place peppers directly on the grill grates and cook on high. - Once roasted, transfer peppers to a plastic bag to steam, about 15 minutes.
(Now is the time to put some kitchen gloves on.) - Carefully remove the chiles from the bag, let cool if need be, cut the chiles open with a knife to remove seeds, and chop the chiles.
Nutrition
This simple recipe for roasting chicken in pieces is key to getting it cooked faster as well as a better flavor because the seasoning touches more of the meat. Roasting your own chicken is so easy with this recipe you may as well roast two while you’re at it to maximize oven space and cooking time. We use this same recipe for serving roast chicken dinner or for building blocks of other recipes like our chicken enchiladas.
Roasting Chicken in Pieces
Ingredients
- 1 (4 pound) chicken , or equal amount of bone-in pieces
Seasoning Rub
- 1 tablespoon sea salt
- 1 1/2 teaspoons freshly ground black pepper
- 2 teaspoons coconut palm sugar — or brown sugar
- 1 teaspoons smoked paprika
- 1 teaspoon granulated onion
- 1/2 teaspoon granulated garlic
- 1 large sweet yellow onion coarsely chopped
- 2 large celery stalks coarsely chopped
- 2 large carrots coarsely chopped
Instructions
Prep the Chicken for Roasting
- Prep the chicken by removing any giblets from the cavity of the bird. Cut the chicken into 7 pieces to include 2 leg & thigh quarters, 2 breast halves, 2 wings, and 1 back, or use ready-cut pieces of bone-in chicken (up to 4 lbs). Trim the wingtips from the wings and place them in a freezer bag with the back to make chicken stock at a later time.
- Mix the salt, pepper, sugar, paprika, granulated onion, and garlic in a small bowl. Using your fingers, rub the seasoning over the pieces of chicken on all sides, using all of the seasonings. Place chicken pieces on a rimmed baking sheet pan, cover with plastic wrap and refrigerate (optional) for 8-24 hours if time allows, or continue to the next step and bake.
Baking the Chicken
- Heat oven to 400°F. (If the chicken is allowed to rest with the seasonings on it in the fridge, remove it from the refrigerator 1 hour before baking to allow to come to room temperature or add a few minutes to the baking time.) Arrange the chopped vegetables on a rimmed baking sheet to form a layer just under the chicken. Lay chicken pieces on top of the vegetables, skin-side up.
- Bake for 40 to 50 minutes or until the thickest part of the breast reaches 160°F and the thighs are at 175°F, using an instant-read thermometer. Since the breast and legs have been separated, pieces that reach the desired temperature can be removed while others finish cooking.
- Once the chicken pieces are done, remove from the oven and transfer to a cutting board to rest for 10-15 minutes. Once cooled, transfer the vegetables and all the pan juices to the bag with the back and wingtips for making stock (if not making stock right away, simply store this bag in the freezer until ready to use).
Notes
Nutrition
Tomatillos might be called “tomates verdes” (“green tomatoes”) but they are not the same as American green tomatoes. Tomatillos, also known as husk tomatoes are very firm with a bright, tangy-tart almost citrus flavor which is an excellent combo with earthy green chiles. While you could substitute American green (unripe) tomatoes for the tomatillos in this recipe, it may take some tinkering with lime, sugar, or salt to get the same flavor profile.
Tomatillo and Green Chile Sauce
Ingredients
- 2 tablespoons bacon grease or coconut oil
- 1 cup chopped sweet yellow onion chopped
- 3 cloves garlic coarsely chopped
- 1/2 pound tomatillos , husked , rinsed, and quartered; about 2 cups
- 3/4 cup 505 Southwestern Green Chile — or canned green chiles (medium heat), 1/4 cup reserved
- 1 teaspoon dried oregano
- 1/2 teaspoon sea salt
- 1/8 teaspoon ground black pepper
- 1 1/2 cups chicken broth
- 1/2 teaspoon liquid smoke
- 3/4 teaspoon ground cumin
- 1/2 teaspoon ground coriander
- 2 teaspoons coconut palm sugar (less if using refined sugar)
Instructions
- In a large saucepan, heat grease or oil over medium heat and saute onions until tender and starting to brown at the edges, about 10 minutes. Add garlic and continue to cook until fragrant, about 2 minutes.
- Transfer onion and garlic to a blender with tomatillos, 1/2 cup of green chiles, oregano, salt, and pepper. Pulse until chopped fine, but not pureed. In the same saucepan, toast the cumin and coriander over medium heat, stirring, for 1 minute until fragrant.
- Pour the blended sauce mixture back into the saucepan and stir in chicken broth, liquid smoke, and remaining 1/4 cup of diced green chiles; simmer for 30 minutes. Taste the sauce and add sugar, one teaspoon at a time, to desired taste.
Notes
- Yields 2 1/2 cups of sauce. Enough for two 9 by 11-inch pans of enchiladas, or roughly 20 servings.
- Store in a glass jar with a lid for up to 1 month in the refrigerator or freeze for up to 3 months.
- I recommend 505 Southwestern Green Chiles because they are widely available and tend to be most consistent in flavor.
Nutrition
Our red ancho chile sauce is made with ancho chile powder which is easy to source and even easier to blend into a sauce than using dried red chile pods. We appreciate the milder flavor of ancho chile but you can certainly spice it up with a little chipotle chile powder in place of some of the ancho powder in the recipe. If you’d rather try your hand at making an enchilada sauce with whole dried chiles, I highly recommend MJ’s New Mexico Red Chile Sauce recipe.
Red Ancho Chile Enchilada Sauce [Gluten-Free]
Ingredients
- 2 tablespoons bacon grease or coconut oil
- 2 tablespoons sweet white rice flour or all-purpose flour
- 3 tablespoons ancho chile powder
- 1 tablespoon smoked paprika
- 2 cups chicken broth
- 2 teaspoons coconut palm sugar or 1 1/4 teaspoon sugar
- 0.5 teaspoon apple cider vinegar
- 0.25 teaspoon garlic powder
- 0.25 teaspoon onion powder
- 0.25 teaspoon ground cumin
- 0.25 teaspoon sea salt
- 0.25 teaspoon ground black pepper
Instructions
- Heat the bacon grease or oil in a saucepan over medium heat. Add the rice flour and stir to combine. Once mixture starts to bubble, reduce heat to medium-low and continue to cook for 1 minutes, stirring constantly.
- Add the chile powder and paprika, stirring to combine for about 30 seconds, just until the chile powder becomes fragrant and forms a paste. Increase heat to medium and add the chicken broth in a steady stream while gently whisking to combine until smooth.
- Add the sugar, vinegar, garlic powder, onion powder, cumin, salt, and pepper; simmer on medium-low heat for 20 minutes. Taste and adjust salt or sugar to balance, as desired.


mjskitchen says
Oh yum! Nothing better than an enchilada! These look quite delicious Judy! I’ll take a Christmas plate please with one red and one green. 🙂 I used to dip my tortillas in oil but now I just dip them in the sauce. I like the texture better but they don’t hold up in the freezer as well. They get a little mushy so the oil dip does work better for that for sure. Great batch of enchiladas!
Judy Purcell says
Thanks MJ! I like one of each too and if I order enchiladas out I always feel a little cheated if I have to pick just one sauce! LOL
John / Kitchen Riffs says
Interesting idea to soften the tortillas in coconut oil — I’ll give that a try. I love enchiladas, and it’s been ages since I’ve made them. I’m partial to Christmas-style — can’t decide whether I prefer red or green chile sauce. So I always opt for both! Really nice recipe — thanks.
Judy Purcell says
Thanks, John, it is hard to choose just one as they are so unique but the flavors all work together.