Soft Homemade Corn Tortillas are superior in taste and texture to store-bought, and what could be easier than a recipe with only three ingredients?
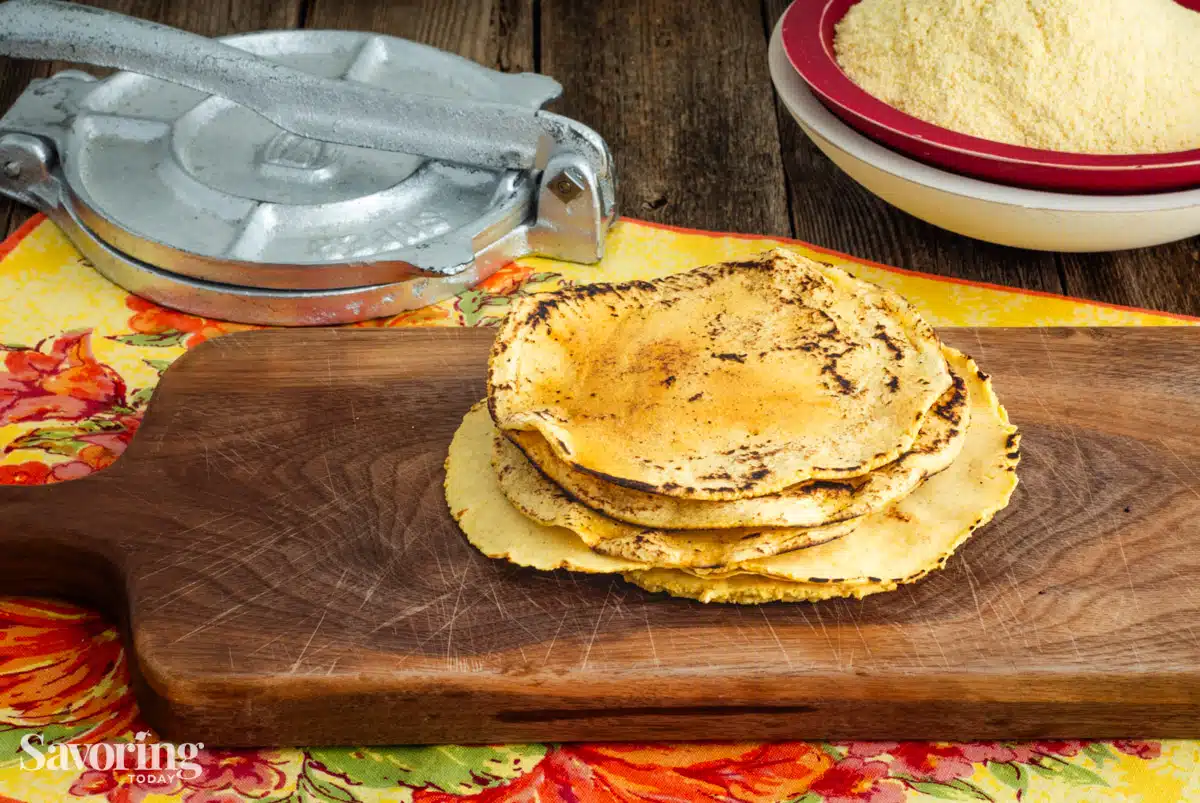
If you have a tortilla press, great! But if you don’t, we’ll show you how simple it is to create beautifully round corn tortillas without any special equipment.
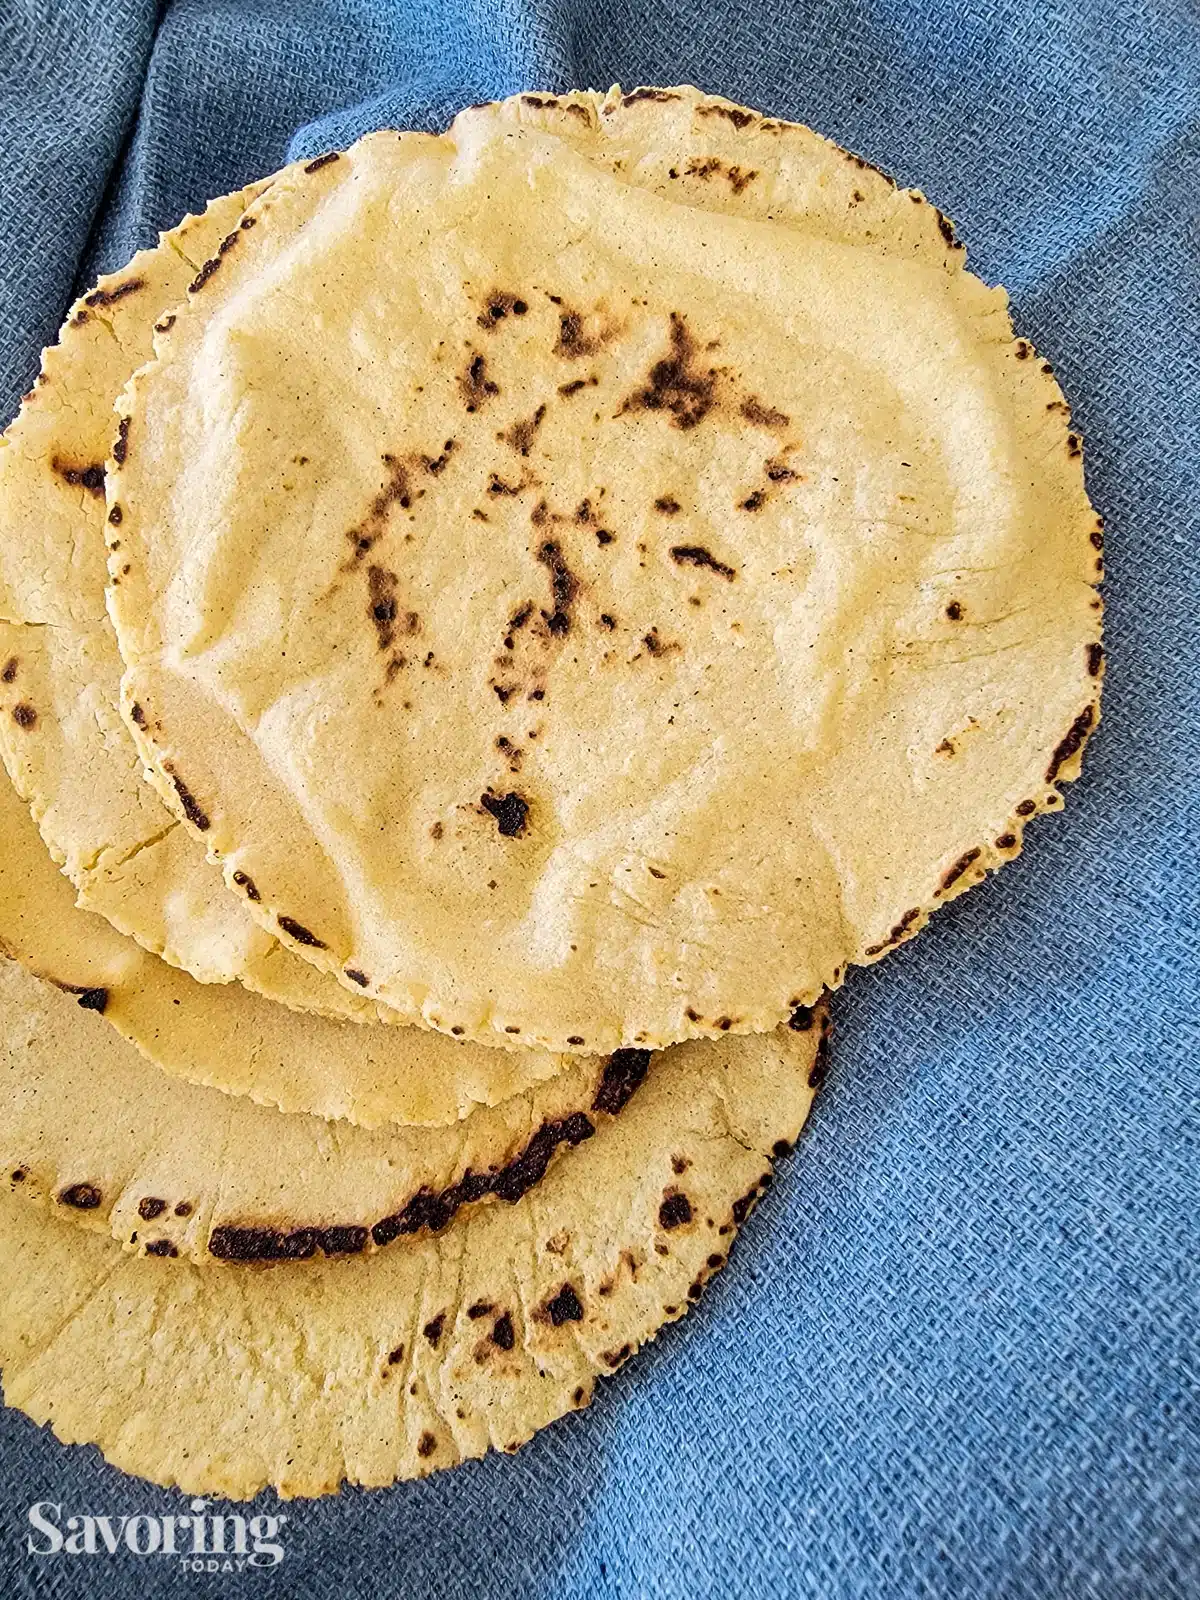
Making fresh corn tortillas is a simple way to add new interest to familiar recipes. The technique may take some practice, but it is worth the learning curve when you sink your teeth into authenticity.
If I can do this, you can do this! This is not the kind of food I grew up with, but cultures worldwide have bread recipes like this that are worthy of learning and highlighting.
The soft texture and sweet corn flavor of homemade tortillas do more than make savory fillings easier to eat with your hands—they make dinner memorable.
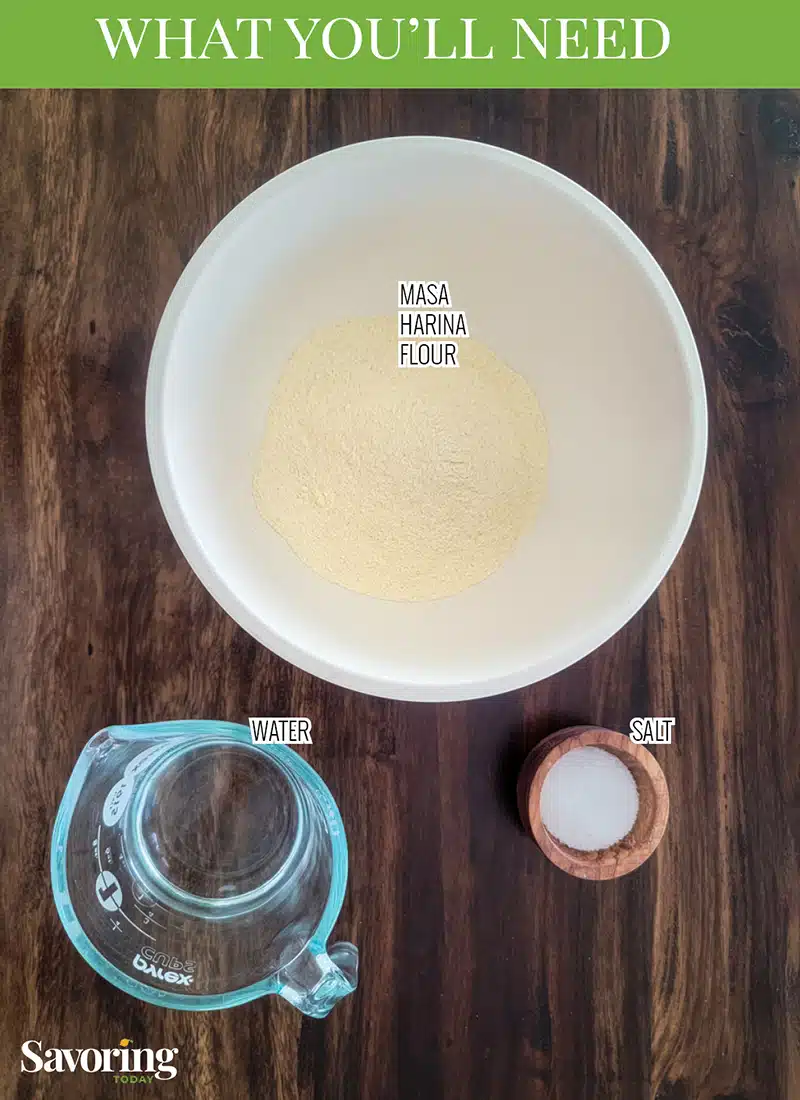
Three Basic Ingredients
- MASA HARINA—When ingredients are few, they matter a great deal. First, masa harina flour is a unique corn flour made from nixtamalized corn kernels (hominy) to improve its nutritional value and texture. When corn has been processed this way, it changes how the flour reacts when shaped and cooked. Masa harina comes in blue, yellow, white, and red, so you can get as creative as you want! For more details, check out this Guide to Masa Harina by Masienda.
- WARM WATER—Use warm water so the flour hydrates quickly. Warm tap water (about 100°F) will do the trick.
- KOSHER SALT—We like adding a little salt because it brings out the best corn flavor. We like to use Kosher salt because it is pure and does not have any metallic flavors that iodized salts may have.
NOTE: Corn flour and corn meal are milled from dried corn kernels and are not suitable substitutes for masa harina.
Top Tips for Beginners
- HYDRATE THE FLOUR PROPERLY. Flour hydration is the key to getting the best results when making any bread-type recipes. The brand of flour and relative humidity can affect the amount of water you’ll need to add, which is why the recipe gives a range. This is also why I recommend letting the dough rest before shaping it.
- A SPRAY BOTTLE with water can be helpful if the dough starts to dry out while figuring out the steps (it takes time to go back and forth reading a recipe).
- FLIP THREE TIMES. You’re creating a seal on each side that will trap the steam in the middle so it puffs. The puff will help it cook and brown in the center and not just at the edges.
- EAT THEM FRESH. It is better to refrigerate the dough (up to 3 days) and cook them fresh for a meal rather than storing them.
How to Make Homemade Corn Tortillas Without a Press
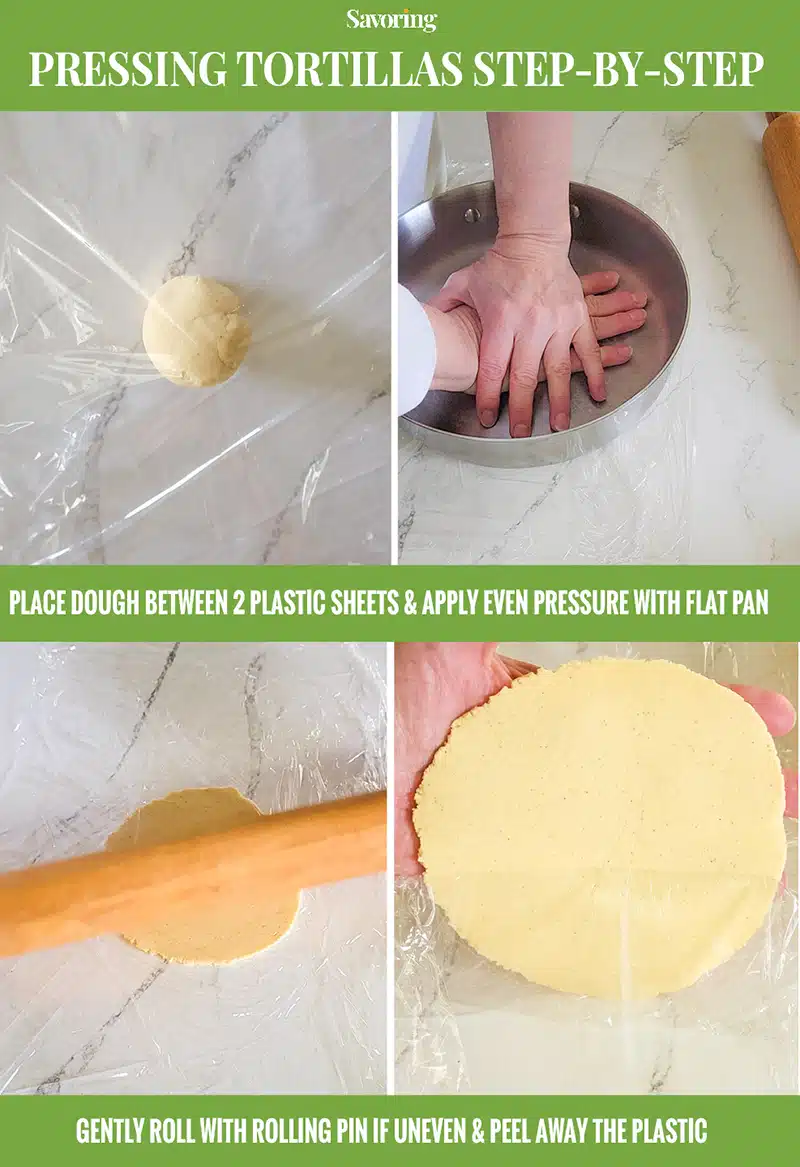
My favorite technique for shaping tortillas without a press is the flat-bottomed skillet or pie plate method—a clear pie plate is helpful for beginners.
This method is quick and surprisingly effective:
- Place the dough ball between two pieces of plastic wrap on a flat work surface.
- Center the skillet or plate over the dough.
- Place your hands in the center of the skillet and press down, applying even pressure. Check the thickness (1/8-inch is the goal) and press again until the tortilla is the right size. TIP: If you can’t press firmly enough to get the tortilla to the ⅛-inch thickness, use a rolling pin to gently roll it out after pressing it with the pan.
NOTE: I don’t recommend using heavy books as they can be difficult to place and are not easy to clean after use.
Cooking Corn Tortillas
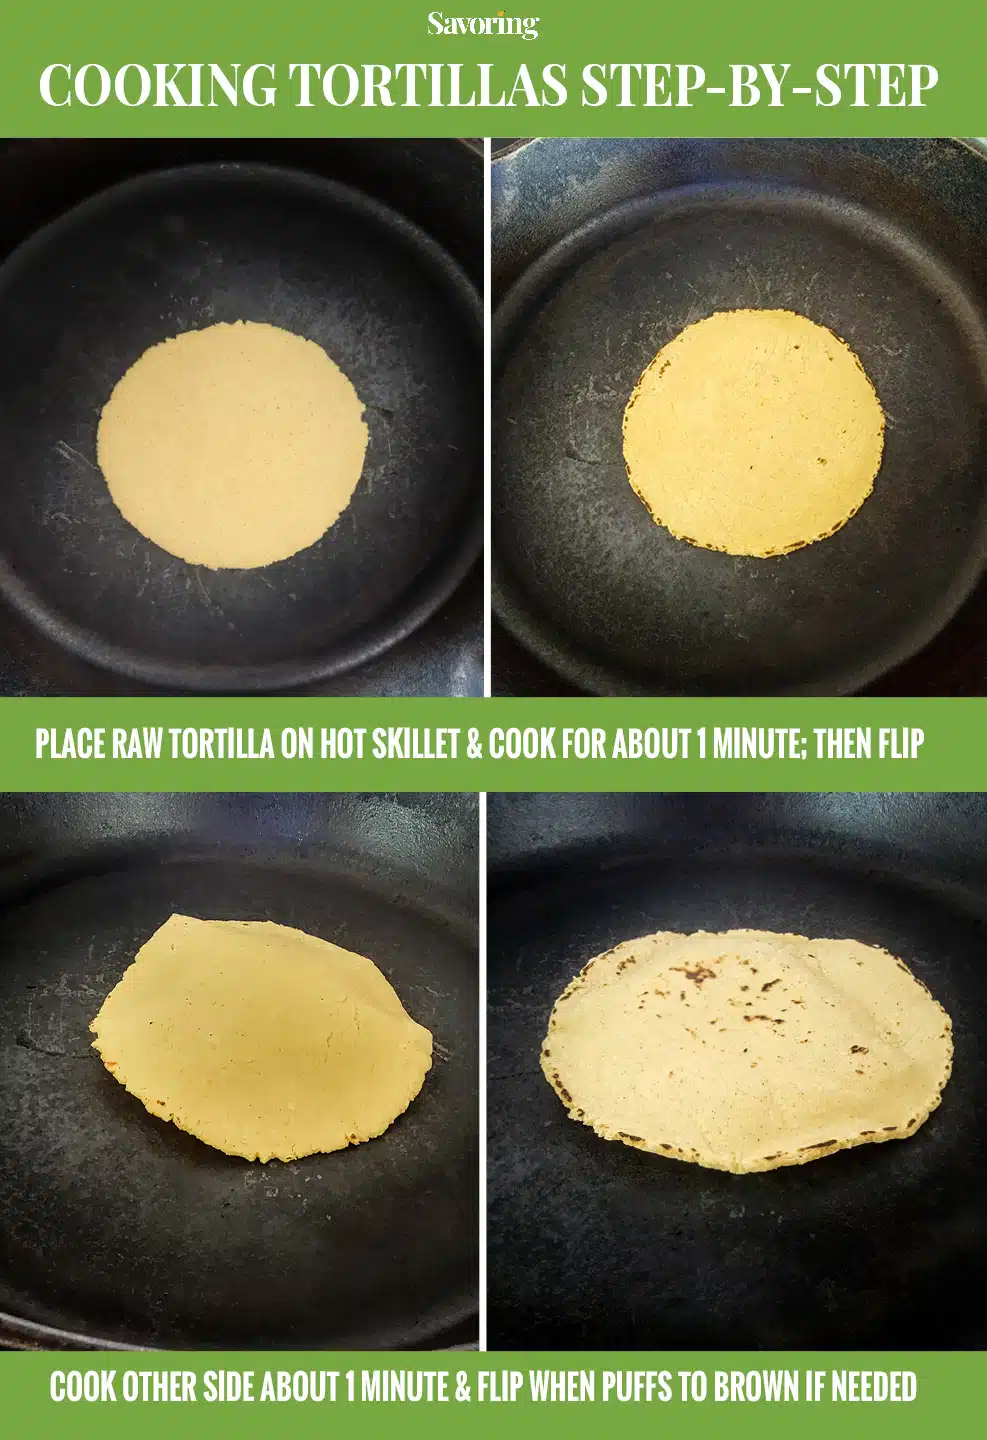
- Heat a dry, seasoned cast iron skillet over medium heat. When the skillet is hot, gently transfer a tortilla to the skillet with your hand or a thin, flat spatula; cook for about 30 seconds.
- Flip to the other side and cook for about 30 seconds. (If it sticks to the pan, adjust the heat up. If it is burning, adjust the heat down.)
- Flip again to the original side and cook another 20 seconds—the tortilla should puff in the middle.
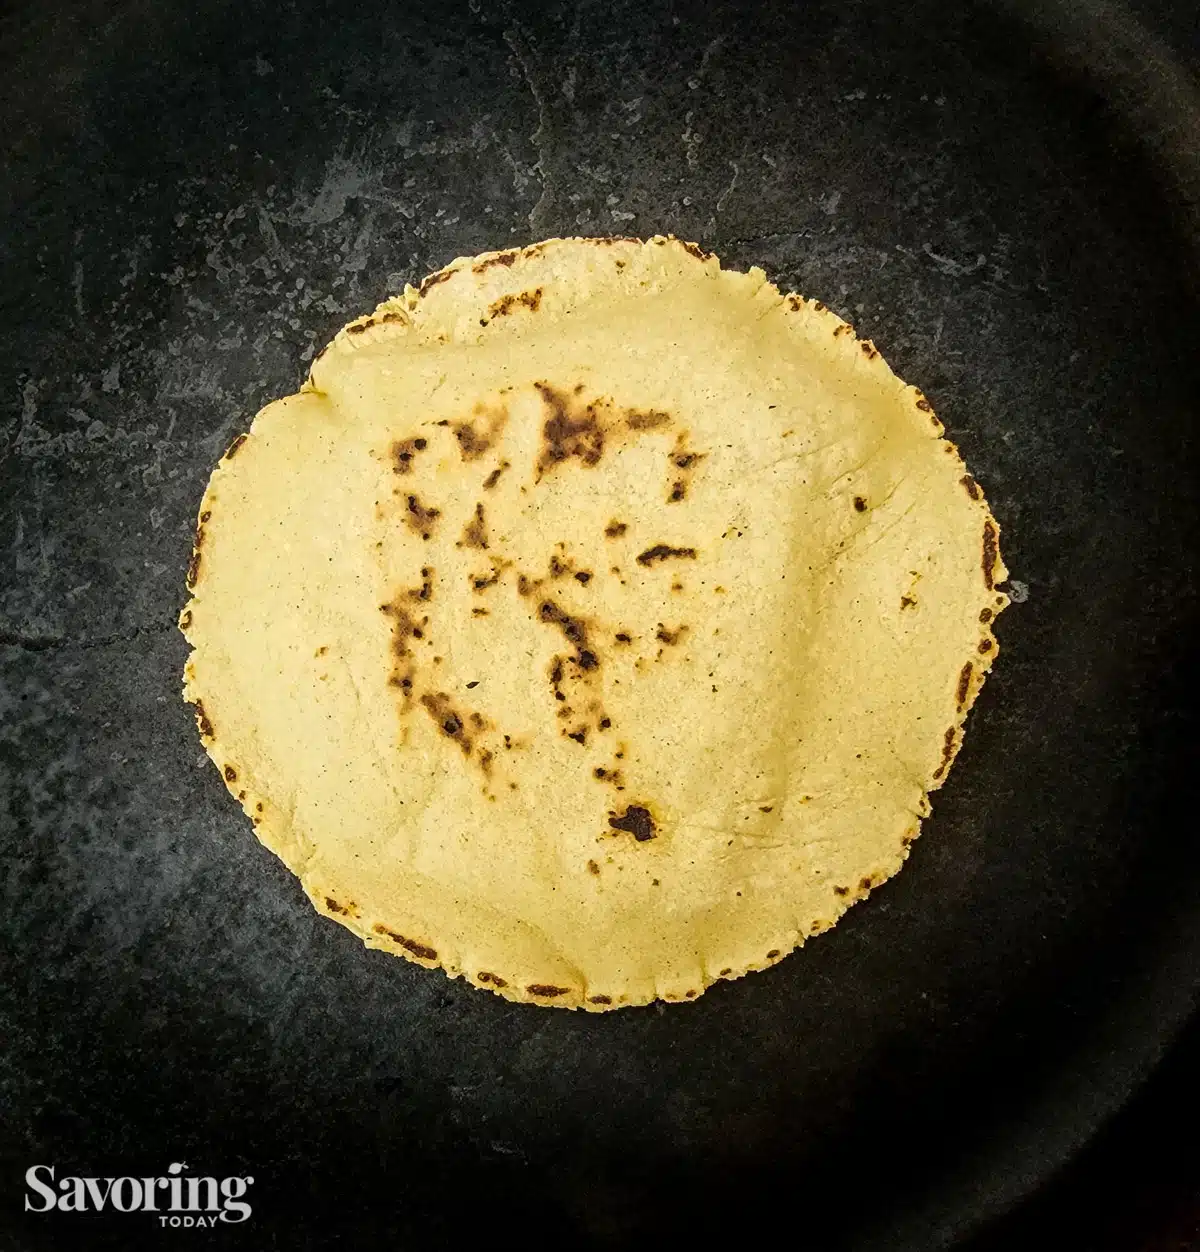
- Now, give it one more flip and cook just a few seconds so that both sides are freckled with browned spots. TOTAL COOKING TIME is about 1 minute on each side, including all flipping.
NOTE: Wisps of smoke may occur. Check the tortilla and modify the heat if needed. It should brown in spots like freckles. If it puffs, that’s good; it will brown better in the middle when it puffs.
Storing Fresh Tortillas
- For tacos or faitas, it is better to refrigerate the dough (2-3 days) and cook them fresh for a meal rather than cooking them ahead.
- The best way to store leftovers is to cool them completely under a damp towel and wrap them in plastic wrap or place them in a zip-type storage bag and refrigerate for 2-3 days.
- Leftover tortillas are best when used in recipes that benefit from crisping them, such as soup toppers, quesadillas, huevos rancheros, or taquitos.
Ways to Serve Homemade Corn Tortillas
Homemade tortillas elevate any meal with their fresh corn flavor and texture. Here are our favorite ways to enjoy them at our house:
- Tacos & Fajitas—The most popular use for fresh corn tortillas is tacos or fajitas. Don’t forget breakfast tacos count, too—fill with scrambled eggs, cheese, and salsa for a delicious start to the day.
- Quesadillas—Also known as flat tacos with melted cheese around here, when these are made with corn tortillas and cut into small triangles, they make the perfect party dipper with Peach Salsa.
- Enchiladas—A pan of chicken enchiladas made with fresh tortillas is comfort food at its best. Since fresh corn tortillas are more pliable than store-bought, you can brush them with a bit of oil and start stuffing.
- Taquitos—Sprinkle taco seasoning over leftover rotisserie chicken or pulled pork, then fill and roll your tortillas to fry or bake until crispy. Serve with salsa for dipping.
- Top Soups & Salads—Brush cooked tortillas with avocado oil and cut into thin strips. Cook the tortilla strips in an air fryer at 400°F until crisp (5-7 minutes). Season with salt and cool. Sprinkle over soup or salads for a crunchy topping.
- Huevos Rancheros—A stand-out breakfast for lazy weekends and holidays.
Homemade Corn Tortillas
Ingredients
FOR THE TORTILLAS:
- 2 cups masa harina
- 1/2 teaspoon sea salt
- 1 1/2 cups warm water
- Tortilla press
EQUIPMENT (if not using a tortilla press):
- Flat-bottomed skillet or pie plate for pressing the tortillas
- Rolling pin for rolling or finishing
Instructions
MIX AND SHAPE THE DOUGH:
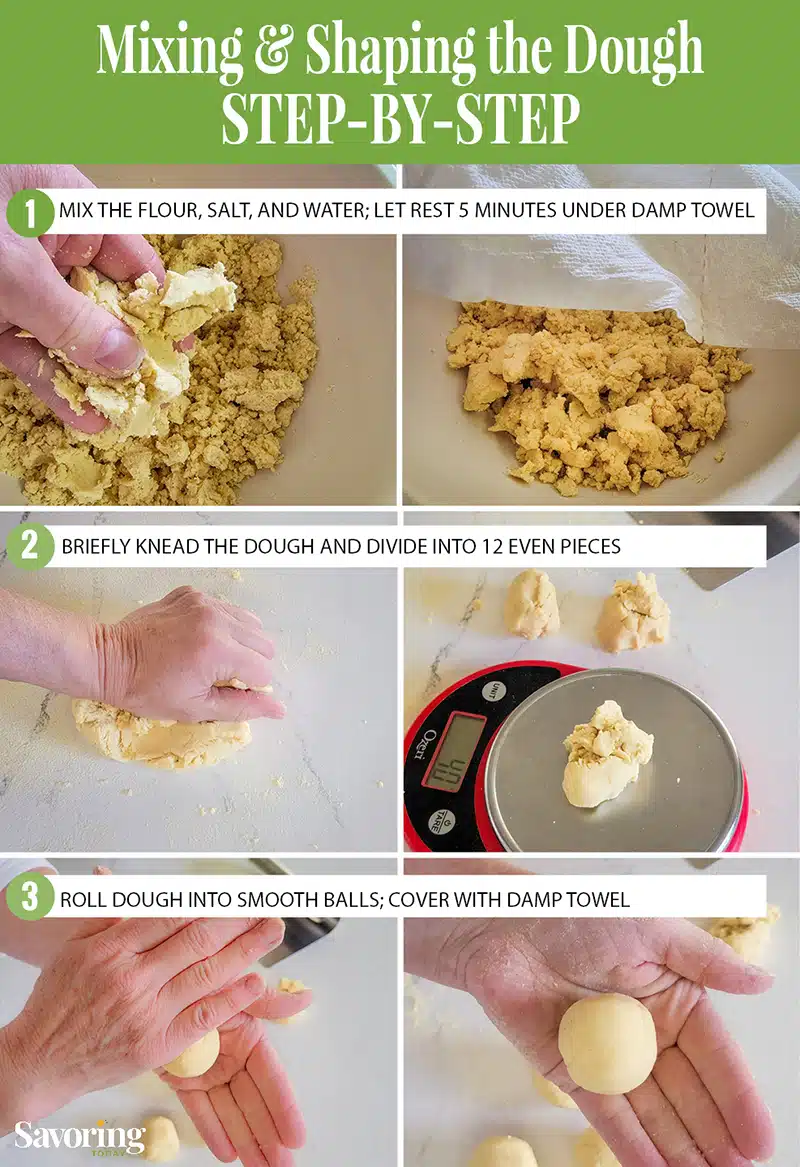
- Mix the masa harina and salt in a mixing bowl. Stir in enough water to hold the dough together in a ball (start with 1 1/4 cups and add more as needed). Cover with a damp towel and let sit for 15-20 minutes to allow the flour to hydrate. Add more water if the dough is crumbly and doesn't hold together when pressed between your fingers.
- WHILE THE DOUGH IS RESTING: Prep a gallon size zip-type bag by trimming off all the outer edges to create 2 separate pieces of the plastic bag about 9 inches square. Or you can use plastic wrap, however, it is harder to keep the plastic wrap from wrinkling and misshaping the tortillas when pressed.
- Turn onto a working surface lightly dusted with masa harina and knead for a few minutes to form a smooth ball. The dough should be soft and just hold together; it should not feel too dry or sticky.
- Divide dough evenly into twelve pieces and roll each into a ball (a kitchen scale is helpful here for equal pieces). Cover balls of dough with a damp towel while working to press and cook them. (The dough can be covered and refrigerated 2-3 days before pressing.)
TO FLATTEN DOUGH WITH A PRESS:
- Place a ball of dough between the two pieces of plastic bag on a tortilla press. Press down on the dough with your palm to flatten slightly then and place in the center of the press. Press the tortilla until it measures about 6 inches in diameter. (If one edge is thicker, rotate and press again to even out.)
TO FLATTEN DOUGH WITHOUT A PRESS:
- Place a ball of dough between the two pieces of plastic bag on flat surface. Center a flat bottomed skillet or pie plate over the dough and with even pressure, press the tortilla until it measures about 6 inches in diameter. TIP: A clear pie plate makes it easier to see if it is centered. You can also use a rolling pin to finish evening out the tortilla.
- Gently remove the tortilla from the plastic by gently peeling the plastic away and transfer to a clean surface and cover with a damp towel (don't stack the uncooked tortillas). Continue to press the dough until all the tortillas are ready to cook.
COOKING THE TORTILLAS:
- Heat a dry, seasoned cast iron skillet over medium heat. When the skillet is hot, gently transfer a tortilla with a thin, flat spatula to the hot skillet and cook about 30 seconds. Flip to the other side and cook about 30 seconds on that side.
- Wisps of smoke may occur. Check the tortilla and modify heat if needed—it should brown in spots like freckles.
- Flip again to the original side and cook another 20-30 seconds; the tortilla should puff in the middle. Now give it one more flip, and cook a few seconds so that both sides are freckled with browned spots. NOTE: TOTAL cooking time is about 1 minute on each side, including all flipping.
- Transfer cooked tortillas to clean dish towel and fold the towel over so they can rest and steam. Repeat with remaining pieces of dough and by the 12th one you’ll have it down.
Notes
- It is better to refrigerate the dough (2-3 days) and cook them fresh for a meal.
- The best way to store leftovers is to cool them completely under a damp towel and wrap them in plastic wrap or place them in a zip-type storage bag and refrigerate for 2-3 days.
- I prefer to use leftover tortillas in recipes that benefit from crisping them, such as soup toppers (noted in the post), huevos rancheros, or taquitos.

Ray says
These were so easy to mix but it did take a little practice with getting them even thickness. The taste was awesome!
Tortilla Fan says
Nice, I’ll definitely try this one out. Such a simple recipe and process though I’m sure the results are just as tasty as the more complicated ones out there!
rsmacaalay says
Wow I never knew it was this easy, I always buy my tortillas at the supermarket