
We take Pioneer Woman’s Sloppy Joes to a whole new level with Caramelized Onion Sprouted Wheat Buns for one delicious sandwich!
")
Sloppy Joes on Caramelized Onion Sprouted Wheat Bun
The Story
Would you believe that last week was the first time I’d ever made Sloppy Joes?
If I am going to make a sandwich out of ground beef, my husband would much prefer a hamburger, hence no Joes, sloppy or otherwise.
Growing up in the Midwest, loose meat sandwiches were common, inexpensive, and filling, but not especially memorable. In fact, it was the school cafeteria variety we hoped to forget.
This type of food always reminds me of our favorite restaurant in Hannibal, The Frost Top, now known as the Mark Twain Dinette, where they served Made-Rites and root beer in a frosted mug.
Truth is, it was the root beer we loved, the sandwiches were just the ticket to the prize.
On a nostalgic whim, I called the restaurant to see if it was still as I remembered. The gal who answered was Missouri-style personable, asking where I lived now, telling me about the menu, wondering if we planned a trip back anytime soon (sometimes I miss that). They celebrated their 70th anniversary this last year and their menu is pretty much the same.
Loose meat sandwiches have been around since before World War II
Adding any number of vegetables or sauces to ground meat helped stretch the meal with hungry mouths to feed.
The no-sauce version was dubbed the Made-Rite, adding a ketchup based sauce turned it into Sloppy Joes. If there were ever a sandwich that needed a name, it is this one—no one wants a “loose meat sandwich”.
Nostalgia aside, in The Pioneer Woman Cooks: Food From My Frontier, I liked the way she served it on buttered, toasted buns, which is brilliant.
With Caramelized Onion Sprouted Buns already in my freezer, I was ready to go.
Ree’s Sloppy Joes recipe has a number of ingredients specified to taste, which is exactly what I would expect, as most folks would have an expectation that it taste a certain way.
Sweet, spicy, tangy, tomato-y, there is plenty of room for putting an accent on the flavor you like best (I used yellow bell pepper over green). The flavor of Caramelized Onion Buns is a perfect paring with a classic like Sloppy Joes.
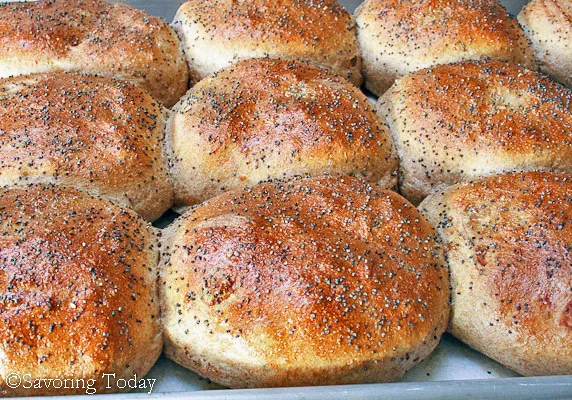
How to Make Caramelized Onion Buns
We use our basic sprouted wheat burger bun recipe and fold in the amazing sweet-savory flavor of caramelized onions. We share the secrets we’ve learned working with sprouted flours to make healthier buns and sandwich bread that will make every sandwich or burger you make—better.
Three Keys to Making Light & Fluffy Sprouted Wheat Buns
- Sprouted White Whole Wheat Flour. You absolutely can make this recipe with any sprouted whole wheat flour. However, I highly recommend the white wheat variety. White and red wheat have the same levels of nutrition, but white has a sweeter, mild (less wheat-y) flavor and produces a lighter texture in soft baked goods like rolls and pastries.
- Patience. The trick is to be patient during the folding process and allow the flour to absorb the liquid in the recipe, and you may need to let it rise a little longer.
- Resist the urge to to add more flour. The dough is sticky, so you’ll be tempted to overcome the sticky-ness with more flour, but if you do that the finished product will be heavier and dry. Pay close attention to whether it is “holding its shape” as described in the recipe. Once the dough slump is minimal, it’s time to switch from flour to oil.
Follow the techniques in our recipe video for working with sprouted wheat flour. The video demonstrates our rye buns, but the steps are the same.
Why is Sprouted Wheat Better For You?
- Makes digestion easier because sprouting initiates the digestion process, breaking down the complex sugars, and the vitamins and minerals more bio-available.
- Improves glycemia (blood sugar) by lowering glucose response and increasing GLP-1 response. See Study.
- Neutralizes enzyme inhibitors and reduces phytic acid (an anti-nutrient) that inhibits absorption of calcium, magnesium, iron, copper, and zinc.
- Naturally manufactures vitamin C, increases vitamin B, carotene levels, and minerals.
Sprouted wheat is a healthy whole food alternative to eating empty white flour carbs.
This post may contain affiliate links. For more information, please see our Disclosure Policy.

Caramelized Onion Sprouted Whole Wheat Buns
Ingredients
- 2 large sweet onions , sliced
- 2 tablespoons olive oil
- 1/4 teaspoon sea salt
- 1 3/4 cups water 110-115°
- 1 (1/4 ounce package) active dry yeast
- 1/4 cup honey
- 5 cups sprouted white whole wheat flour
- 2 tablespoons melted butter
- 1 egg
- 1 egg yolk
- 2 teaspoons sea salt
- 1 egg white , reserved, lightly beaten
- poppy seeds , optional
- avocado oil , or extra-virgin olive oil
Instructions
- Heat olive oil in a cast iron skillet over medium heat until oil covers the pan evenly and is hot. Add the sliced onions and stir enough to coat the onions with the oil. Continue to cook onions over medium heat, stirring occasionally until onions begin to brown, about 10 minutes.
- Season with salt and spread onions evenly over bottom of skillet, reduce heat to low. Cover and allow onions to gently caramelize for about 45 minutes, stirring occasionally to ensure they brown evenly. Onions should be golden brown when done.
- Once done, allow onions to cool enough to handle, then coarsely chop onions.
- While the onions are cooking:
- Using the paddle attachment, mix in the onions, 2 tablespoons butter, 1 whole egg, 1 egg yolk (reserve egg white), and 2 1/2 cups of the flour on medium-low speed until smooth. Drape with a towel and let dough rest for 20 minutes.
- Add 2 teaspoons sea salt and enough of the remaining flour (1/2 cup at a time), mixing 1 minute after each add, to form a soft, shaggy dough (up to 5 1/2 cups total - humidity can affect the amount of flour it will take).Once the dough holds it's shape (though sticky) and is stable on the mixing paddle, spread 1/4 cup of flour out on the counter and sprinkle on dough. (See recipe video for demo.)With floured hands, knead dough by folding over and turning 4 or 5 times to form a soft ball that holds its shape and no longer slumps. Scrape any remaining flour from the counter and spread 1 tablespoon of oil on the counter. Leave the dough to rest on the counter and cover with a bowl for 5 minutes. With oiled hands, fold the dough 4 or 5 times again, and cover with the bowl to rest again for 5 minutes. Repeat one more time so the dough has 3 folding processes and 3 rests of 5 minutes each. This process allows the flour to fully hydrate.TIP: Because the dough can be tacky, use a pastry knife to help the dough release from the counter rather than adding more flour, which will make the dough heavy.
- While you shouldn't need to, at this point, if the dough is still is not holding its shape and is too wet to handle, add 2-3 tablespoons more flour and complete the folding process again with an additional 5 minute rest.Otherwise, after the three folding/resting cycles, if the dough is forming a soft ball and is manageable with oiled hands, place the dough in an oiled bowl, turning over so the oiled surface it face-up.
- Cover the bowl with plastic wrap and then a towel, and let it rise in a warm spot (above 70°) for 1 1/2 to 2 hours, or until nearly doubled in bulk. (The oven, with the oven light ON is a great place to let the dough rise if the room is cool.)
- With oiled hands, punch down dough and divide it into 16 pieces on a lightly oiled surface (It is ideal to use a kitchen scale to measure the dough and then divide by 16 for the ideal weight of even bun).Shape each piece into a round, smooth ball, place on a parchment-lined baking sheet, and flatten with the palm of the hand to about 3" across (it helps to have oil on your hands when flattening the buns). It is best if the sides of the buns touch when flattened.Cover with a lightweight smooth towel, tented aluminum foil, or inverted rimmed baking sheet if the room is drafty. Let rise about 40 minutes, or almost doubled in size. (Because the dough can be tacky, avoid covering with terry cloth or microfiber cloth towels, which can "grab" the top of the dough.)

- Just before placing in the oven, brush the buns gently with the beaten egg white on all exposed sides, sprinkle with poppy seeds. Alternatively, brush with melted butter once the are baked and removed from the oven for soft, matte finish.
- Bake the buns in a preheated 375°F oven until golden in color, about 16 to 18, or until the internal temperature reaches 190°F using an instant-read thermometer. Cool the buns on a wire rack. Slice once completely cooled.
Video Displays Here or In Post
Notes
- The egg wash helps the seeds to stick and give the buns a shiny crust. Brush with melted butter for a soft, matte finish.
- The weather and type of flour can have an impact on the feel of the dough and how tacky it feels. Avoid adding a lot of extra flour to the dough to make it more manageable. Instead, use a pastry knife to scrape and lift it when kneading or switch to an oiled surface and oil for your hands to manage the dough.
- For high altitude, it may take less flour and a shorter rise time, closer to 5 cups of flour and one hour to rise. Yeast breads can be sensitive to humidity, so the amount of flour will vary.
Equipment

Nutrition
")
To read my full review of the book, visit this link: The Pioneer Woman Cooks: Food From My Frontier
Michele says
Can you make dough in a bread machine? These look amazing….
Wendy says
Love sloppy Joes, love the buns!
Janina says
Thank you very much for the recipe, I am not an American citizen, but I’m taking this recipe looks delicious!
marty stein says
tad bit confused.Yield 16 buns. following the recipe- divide dough into 8 balls??? please clarify
Judy Purcell says
Hi Marty, thank you so much for asking about that, I was proofing recipes last week and discovered this mistake, but hadn’t fixed it yet. I have updated the information for making 16 rolls, which is the size that we really prefer — works great for just about any sandwich. Please let me know if you have any other questions. 🙂
Raymund says
Those buns looks so perfect!
Hannah says
Caramelized onions make everything taste heavenly! However, those buns sound even better to me- Love the poppy seed finishing touch.
Karen (Back Road Journal) says
I haven’t had a sloppy joe in years. On one of your buns…it must have been great.
sportsglutton says
I can’t believe that you’d have had sloppy joes until this recipe. however, this looks like a perfect joe to start with!
Have a great weekend Judy!
Claudia Johnson says
Yum!!!! Can’t wait to try them… Maybe today!
Bunkycooks says
There is nothing as nostalgic as sloppy joes! I have a recipe from years ago and now I want to pull it out and make a batch! BTW, your bread looks amazing.
Pure Complex says
I haven’t had a sloppy joe in so darn long. And now you’re making me want to go home and make this immediately :). However I must ask.. where is the cole slaw recipe? Girl that cole slaw is calling me too lol. Seriously 🙂
Judy Purcell says
Ha! You are funny, and very perceptive — that is some fab cole slaw right there. Here’s the recipe: http://savoringtoday.com/2010/08/24/coleslaw-with-celery-seed/ And if you’re in the mood for some non-traditional cole slaw, these are wonderful too: http://savoringtoday.com/2011/06/28/beyond-classic-slaw-test-kitchen-tuesday/ Have a great weekend!
Caroline says
Your bread is stunning!!!! Is that weird to call bread stunning? Well, either way it is, and looks so delicious. Don’t even get me started on the sloppy joe. 😉
Judy Purcell says
Weird? NO! I’ll take it! Thanks so much for such an enthusiastic compliment, made my day. 😀
Geni says
Holy heck Judy, those buns are fantastic! They look very professional with all the good for you, fresh ingredients of homemade. WOW! I have still never made a Sloppy Joe if you can believe it. Maybe I should give it a go. Definitely, the buns will be on my list of “things to make soon.” Take care.
Judy Purcell says
Thanks so much Geni for your sweet words! Funny how some staples for some folks don’t make into the dinner table of others — sloppy joes was definitely one of those for us too. I think whatever you decide to put on these buns will be a hit. Have a great weekend!
Barb Bamber says
Your buns are just spectacular!! I love Sloppy Joe’s they’re comfort food and so quick to serve on a weeknight.. I’m going to have to make these buns to go with!
Judy Purcell says
Aw, thanks Barb, I do a happy dance every time I make them. Baking is not my favorite thing, so when a recipe turns out like this, it’s a reason to celebrate. 😉
ChgoJohn says
These rolls look delicious and would be perfect for the mess that is a good sloppy Joe.
Judy Purcell says
Thanks, John, it was a delicious mess for sure, but the buns held up!